Check out my new tutorial. I think you might really like this one!
Showing posts with label crafty. Show all posts
Tuesday, April 23, 2013
Friday, March 22, 2013
During the Renovations
Day one of the renovations walls started going up and major changes happened rather quickly.
We began our long process of staying up all hours of the night followed by coming back to work "later that morning". Days blurred into one another but our strength and energy were renewed each morning. There were no injuries or catastrophies during the week and our resources were multiplied and stretched over and over. It was a joy to be involved in all of it.
It was so cool to see God use the gifts and talents of all of these different people come together in this project.....things like electrical wiring, sound, computer technology, construction, budgeting, planning, organizing, design, painting, and so much more.
One night during the week our church invited anyone who wanted to be a part of the renovation to come up, grab a paint brush and join us. Childcare was offered and the turnout was incredible.
I love and appreciate each and every one of our amazing volunteers who came and worked so cheerfully alongside us that night and so many other times (day and night) through the entire week.
a community- a family- working together - loving others - following Jesus
Color really made the space come to life and toward the end of the week things were all coming together and we knew we would have something special to surprise the kids and the church with on Sunday morning.
......more pictures of finished projects to come in the next post. Yay!
Thursday, March 21, 2013
Kids Church Re-Design Part 1 - The "Before" Pictures
I am so excited to share this project with all of you!
Let's see, where to begin?
Ok, so a few weeks ago my sweet friend Jenna (our amazing children's minister) called me and asked if Jeremy and I would be interested in working with another insanely talented and creative couple in our church to do a little make-over in the children's building. You see, someone had made a donation to spruce the place up a bit and given this opportunity well, how could we possibly decline! We were super excited and we were going to pray over and stretch every penny as far as it would go as our imagination buckets were spilling over with ideas right from the start. It was time to create an exciting and inviting safe place (within the walls of this large stale gray portable bulding) for our kids to come and learn about the Word of God.
I cannot tell you what a thrilling challenge this project has been for us, and how blessed we feel to be a part of it.
Here are the "Before" photos of the children's building:
*P.S. Did I mention that our pastor told us when we joined the church last summer that there was another couple named Lori and Johnny that did all kinds of building and decorating projects and that someday we would wind up meeting them and when we did everybody better watch out cause there's no tellin' what kind of trouble the four of us would get into. LOL
Boy was that ever true!!! What a fabulous new friendship has blossomed out of this endeavor.
So when you walk up the concrete steps outside and enter the double glass doors you are immediately in one enormous rectangular room. There used to be this curved metal and glass table that served as the "check-in and check-out" station.
To the left as you enter there is a storage area for extra tables and chairs hidden by an accordian style wall enclosure. Then a window beside the exit door that leads out toward the church office and main sanctuary.
In this picture you can see the two tiered black stage with a large projection screen flanked by four large speakers. There is a small closet in the corner and a makeshift counter that serves as the "sound booth" and video control area.
Here you can see straight into the room as if you just walked in the front doors. Beside the "sound booth" was a large fun paper tree that went all the way up onto the ceiling tiles. Next to that were a couple of "office style" fabric covered partitions that created a little "wall" so that class supplies could be hidden on shelves behind it in the recessed area next to the other little utility closet (that has a water heater I believe).
As you continue around the room there is another alcove area on the right side of that small water heater closet.
Past the tables on the far east wall are three doors. The first is the boys bathroom followed by the girls bathroom and then the janitorial closet.
The lovely banners and christmas lights were decorations from a recent banquet.
oops.....same pic again, sorry
continue on.....
Here you can see a little farther down that wall is a very large pass-thru style window between the kitchen area and this main room.
Finally on the end of that wall is the door to the kitchen.
Coming full circle you can see a wall section leading back to the main entrance where there are two windows that overlook the church playground area.
And now we are back to our entrance.
I hope you enjoyed the full circle view of how it used to be.
Just wait till you see what a transformation will take place in this space!
Saturday, January 5, 2013
A Handcrafted Christmas.....
Now that all of these gifts have reached their beloved recipients I would like to share with you some of my favorite art and craft gift creations from the 2012 Christmas season.
Saturday, December 8, 2012
Monday, October 22, 2012
The "Fall der All" Festival
Hello everyone!
If we met this past Saturday at the Fall der All festival, I hope you had a wonderful time (and didn't get blown away by the wind, lol). I'm so glad you are visiting my blog.
Please bear with me, it has been a little crazy getting ready for the festival and now re-organizing all of my fun stuff in the studio. I will be posting some new pictures and lots of new things for sale in my Etsy shop tonight and tomorrow.
Hope to help you with your Christmas shopping ideas very soon!
Have a blessed day!
Jackie
*pics of fun stuff from the festival.... (many of these items will be in my Etsy in the next day or so)
If we met this past Saturday at the Fall der All festival, I hope you had a wonderful time (and didn't get blown away by the wind, lol). I'm so glad you are visiting my blog.
Please bear with me, it has been a little crazy getting ready for the festival and now re-organizing all of my fun stuff in the studio. I will be posting some new pictures and lots of new things for sale in my Etsy shop tonight and tomorrow.
Hope to help you with your Christmas shopping ideas very soon!
Have a blessed day!
Jackie
*pics of fun stuff from the festival.... (many of these items will be in my Etsy in the next day or so)
Thursday, October 11, 2012
Monday, August 27, 2012
Geography Classroom Makeover
So, my hubby has a new classroom at the new high school this year where he will be teaching Geography. I love Geography and wanted to do something special for him to get the year off to a great start.
He works so hard and I'm so proud of him and thankful for all he does. Since he has been very busy with Football and back to school meetings, scrimmages, practices and all of those fun time consuming things I decided to give his room a little makeover. We were able to work together for a couple of hours before he had to leave for a scrimmage and it was fun to have that time together while grandma kept the kiddos.
Here is a visual tour of the way it was, the artworks I surprised him with, and the end result:
He works so hard and I'm so proud of him and thankful for all he does. Since he has been very busy with Football and back to school meetings, scrimmages, practices and all of those fun time consuming things I decided to give his room a little makeover. We were able to work together for a couple of hours before he had to leave for a scrimmage and it was fun to have that time together while grandma kept the kiddos.
Here is a visual tour of the way it was, the artworks I surprised him with, and the end result:
It was fun to surprise him with this special artwork. I love the quote I found to go with it!
These hanging globes were inspired by my obsessive love of Pinterest crafts!
And here's how it all came together:
Tuesday, May 29, 2012
Faux Bronze Ballerina Sculpture Tutorial
Thursday, May 3, 2012
Making Stuff for this Weekend
I'm so excited to be doing a booth with my friend Sandy this weekend at the Arts & Crafts fair in Farmersville! We have both been crazy busy with "making stuff" and getting ready for the event.
Some things I've been working on are:
Art prints of my photography on wood blocks. They can hang from the decorative wire embellishments or sit on their own on a table.
Glass pendants that can be used as necklace charms or keychains.
Precious tiny domino pendants.
Lots of shoe clips for warm weather accessorizing.
New! Vintage style screen printed shirts. I LOVE these wonderful soft, flattering shirts! I found them on a recent shopping trip and bought as many as I could to print on. I may wind up keeping one of each for myself, LOL! :)
Anyway, for those of you who are in the area, come out and see us at the"Farmers & Fleas Market" this Saturday May 5, 2012 from 9-3. More info here http://www.farmersvilletx.com/index.jsp
Sneak Peak at the things I'm selling......
Some things I've been working on are:
Art prints of my photography on wood blocks. They can hang from the decorative wire embellishments or sit on their own on a table.
Glass pendants that can be used as necklace charms or keychains.
Precious tiny domino pendants.
Lots of shoe clips for warm weather accessorizing.
New! Vintage style screen printed shirts. I LOVE these wonderful soft, flattering shirts! I found them on a recent shopping trip and bought as many as I could to print on. I may wind up keeping one of each for myself, LOL! :)
Anyway, for those of you who are in the area, come out and see us at the"Farmers & Fleas Market" this Saturday May 5, 2012 from 9-3. More info here http://www.farmersvilletx.com/index.jsp
Sneak Peak at the things I'm selling......
Labels:
crafty,
events,
furniture,
gift ideas,
jewelry,
photography,
screenprinting,
sewing
Thursday, March 22, 2012
A Treasure Box Full of Fabrics
The treasure box of fabric remnants I received from a very sweet "friend of a friend".
Thank you!!!
And the first project I made from some of the remnants!
See the full tutorial here
Labels:
crafty,
diy projects,
fabric remnants,
fabrics,
sewing,
shirt,
tutorial
Tuesday, March 13, 2012
Draw With Me
Daddy's brother came to town to visit for a couple of days and one evening while they hung out and entertained our youngest daughter with toys and books in the living room my big girl and I did some art making in the studio.
We took some pages from an old dictionary and started sketching.
I love the way these colorful drawings look on book pages.
Love you sweet girl, thank you for making art with mommy! xoxo
Wednesday, February 1, 2012
Clip on Tie Projects
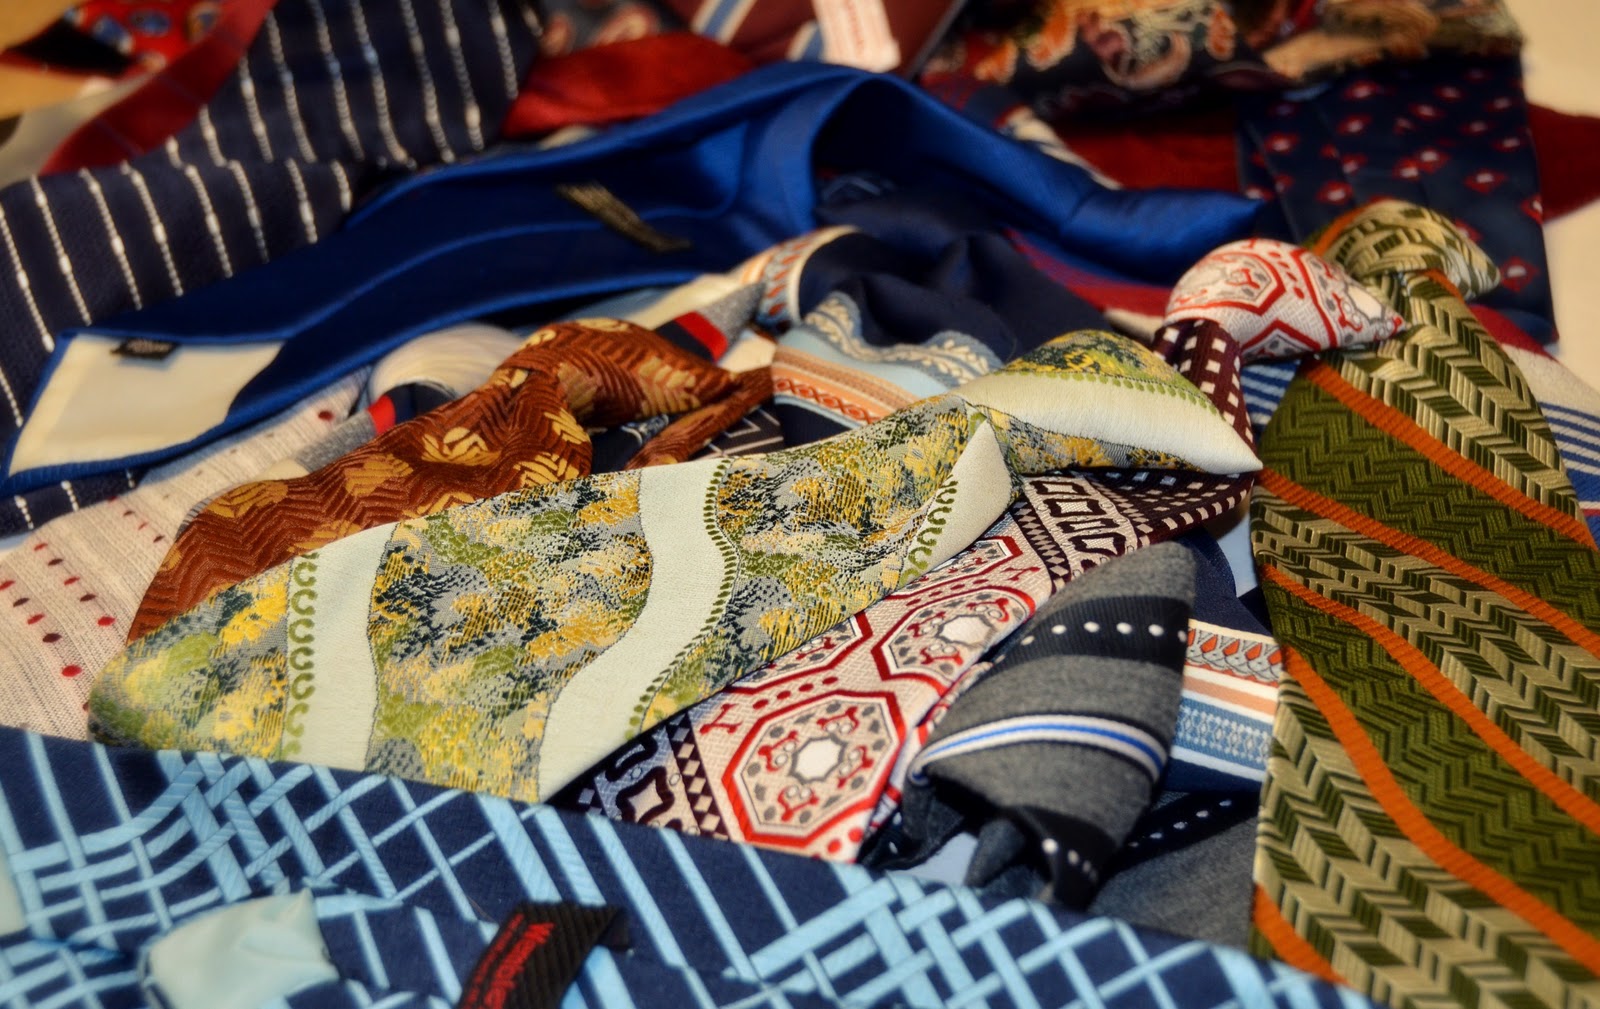
My sweet friend Jennifer surprised me with a bag full of wonderful vintage things that she said I could have to "make stuff"! Oh boy, I was so excited!
Just look at this pile of wonderful clip on ties! The fabrics, the patterns, the colors... oh my!
So many ideas ran through my head as I gazed at each colorful design. I could put several together and create a kind of peek-a-boo slip that would add a touch of chic to the bottom of a skirt. I could sew several of them together and create a retro purse. Hmmm.... all good possibilities, but I finally decided to sit down and see how many things I could re-purpose out of just one tie.
So I picked this one:
And I cut it into 3 different accessory pieces. (I'm still perfecting the details and may be able to get one more piece out of it so when I do I will post a tutorial).
For now, here's what I made:
A clip-on Phone Case
A Pen and Pencil Holder
A Mini Wallet/Card Carrying Case
What would you do with these great clip-on ties?
Labels:
card holder,
clip on tie,
crafty,
diy projects,
pen case,
phone case,
repurpose,
reuse,
sewing,
upcycled,
vintage,
wallet
Friday, January 13, 2012
Christmas Projects Revealed - Part 3
Photo Transfer Artworks
I had a great time experimenting and creating some new photo transfer artworks on wood and incorporating architectural and metal embellishments.
Here is an example of one of the finished pieces:
If you would like to see some basic steps on how I did these photo transfer artworks I have posted the project on my tutorials.
Saturday, January 7, 2012
Christmas Projects Revealed - Part 1
Since all the presents have now been opened I can reveal some of the Christmas Projects I worked on this year.
The first I'll share with you all is a "themed gift" that I really enjoyed putting together for my husband's cousin. Since she loves books and we are both on Pinterest I used ideas from her Pinterest boards to create an all hand made book themed gift.
First I experimented with an old book, I tried a few different things before deciding to take it apart.
I rolled the inside pages tightly and secured with a strong rubber band and then wrapped it with a piece of vintage ribbon and embellished with paper flowers and a jeweled centerpiece. It didn't look complete, so I went out to the garage and grabbed my (ok, my husbands ;->) Dremmel tool. I found a tip with a tapered point and went to work carving the word "Read" into the tightly rolled pages.
With the book cover I lined the inside with a beautiful fabric and made her a stationery set with cards, envelopes and a pen. simply secured with elastic.
The next item in the collection was a glass ornament. I cut tiny strips of paper from an old dictionary that had the definitions for terms like: library, textbook, poetry, reader, writer, etc. I curled the strips and put them inside and finished it off with a simple bow.
With the same dictionary pages I cut out a small section about reading and decoupaged it to the back side of a square glass charm and added a turquoise camio to the front.
Next it was time to create a whimsical paper weight from a smooth rock. I painted a cute little owl and finished it off with a clear acrylic top coat.
Finally, I added in a ribbon bookmark to the gift set. It was very simply embellished with a pearl bead on one end and a tiny picture frame on the other.
So there you have it, a book themed gift set inspired by the collection of vast and wonderful ideas on Pinterest. I hope the recipient enjoys it!
And maybe you will be inspired to create your own themed gift for someone special in your life....hmmm, any occasions coming up soon?
....yes, maybe for Valentines Day
Tuesday, January 3, 2012
Hand Crafted Anniversary Gifts
My husband and I celebrated another wonderful anniversary during the Christmas Break.
One thing we promised to do this year was to make our gifts instead of purchasing something and I'm so glad we did.
Here are the gifts
one cut and carved and sanded by him
the other measured and folded and stitched by her
a wooden bread tray....
to use when she cooks and serves her family meals with love
a leather Bible cover....
to protect God's word as he studies and prays and leads his family with love
Saturday, December 3, 2011
DIY Feather Headbands Tutorial
Sunday, November 20, 2011
The Looking Glass Effect
I recently a posted a pin on my Pinterest board featuring really beautiful photo of a lamp that was painted to look like it had an antique mirror finish using Krylon Looking Glass spray paint. This is the site it came from: http://www.ivillage.com/diy-hacks/7-b-363227#363228
So I searched all over and finally found some of this wonderful paint and tried it on a couple of projects of my own.
I made new Christmas ornaments and gave a lovely new look to an old glass candy jar. I have many more ideas in mind so I must plan a trip to the second hand store soon. :D
Check out the process & what I made in my tutorials here:
Tuesday, November 15, 2011
Thursday, October 27, 2011
Tie Dye T-Shirts with Sharpie Markers!
Such a fun and easy tie dye project.
My 6 year old and I had a great time doing this together with stuff we had available at home.
Check out the tutorial here
Labels:
crafty,
diy projects,
DIY shirt,
gift ideas,
iron on,
markers,
sharpies,
tie dye,
tshirt
Subscribe to:
Posts (Atom)